Basic Regions
| Author: Wizardum (udmod.com) | Tags: beginner terrain region | |
| Source: http://www.udmod.com/showthread.php... | Added 15 years ago |
The region system of the Galaxy Editor is quite easy to use yet very powerful.
You can create any shape for a region with smart of use of rectangular and circular regions.
Let’s get to the basics
You probably start the editor with the terrain layer open, to open the region editor go to Layer -> Regions or you can just press “R” from the keyboard.
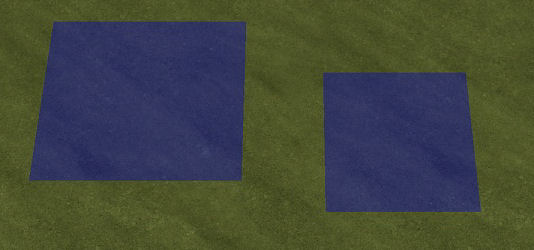
You now can create regions by clicking the square button and press and drag on the terrain, when you feel it’s the right size of the region you just stop pressing the mouse button. To create regions you can also just click in the terrain and move the mouse and it will update the region’s size automatically. To finish creating the region click again.
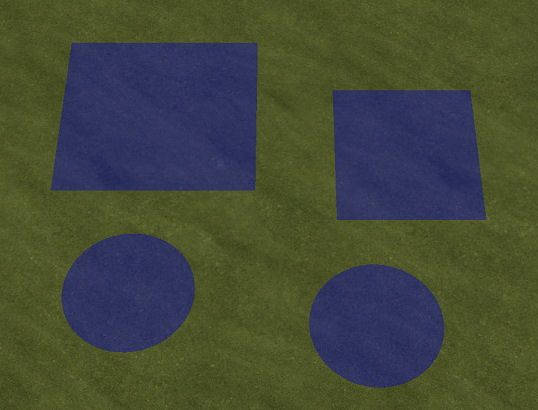
The same for circular regions.
Now, to change to Selection Mode you just press the Space-bar and a double-click a region.
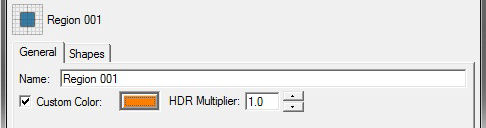
A window will pop-up with two tabs.
The General tab you can change the name of the region and the region’s color. The HDR Multiplier I don’t know what is it yet, but I believe it’s isn’t that useful in-game since the regions don’t appear.
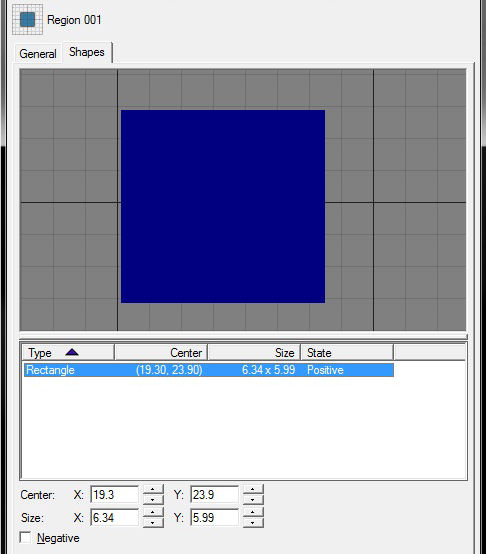
The Shapes tab is where you can change the region’s size, the region’s center position and also make custom shapes.
The Negative checkbox is only used for custom shapes, so it will be explained later on.
Custom Shapes
Custom shapes are created by making additional regions inside an already created region.
To do so you have to right-click anywhere on the regions list, if you right-click on a region you can duplicate it and if there is more than one region on the list, you can delete it.
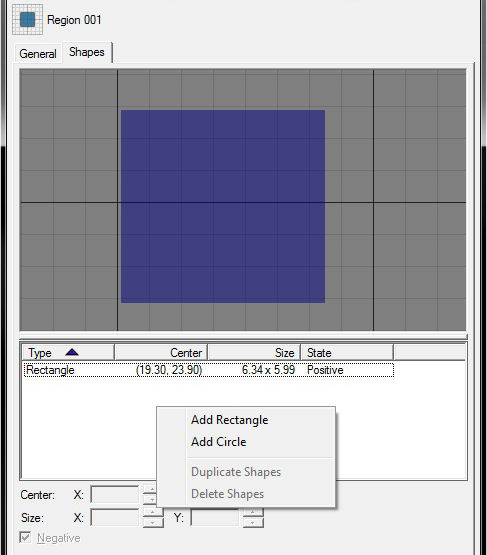
Now create a circular region, set the center point and the size where you want and check the Negative checkbox.
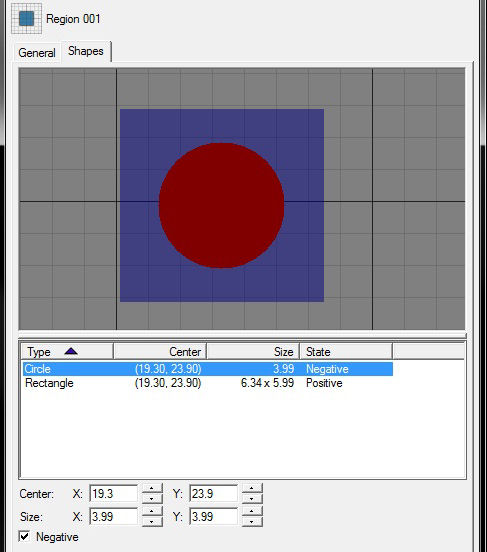
Checking the negative box on the circular region deletes that area in the rectangle region.
Press ok to see the results.
You’ll see an orange rectangle with an empty circle inside it, basically the region is only the orange part.
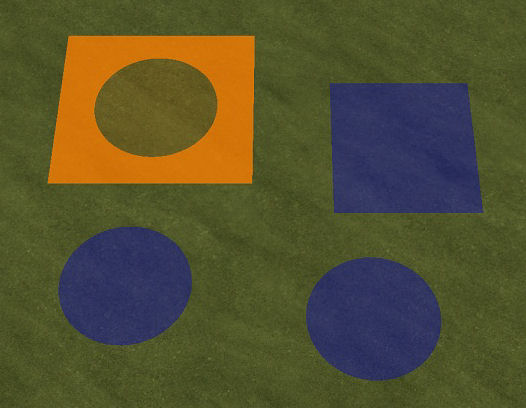
And you successfully created a custom shape.
You can create any shape with this, just remember, the limit is your imagination.
You can also change the shapes' position inside a region, by selecting the region, select the shape you want to move and then you can drag it to where you want it.
After selecting the shape the first time you can drag and drop any shape inside the region.
Hope this tutorial was useful to you.
You can create any shape for a region with smart of use of rectangular and circular regions.
Let’s get to the basics
You probably start the editor with the terrain layer open, to open the region editor go to Layer -> Regions or you can just press “R” from the keyboard.
You now can create regions by clicking the square button and press and drag on the terrain, when you feel it’s the right size of the region you just stop pressing the mouse button. To create regions you can also just click in the terrain and move the mouse and it will update the region’s size automatically. To finish creating the region click again.
The same for circular regions.
Now, to change to Selection Mode you just press the Space-bar and a double-click a region.
A window will pop-up with two tabs.
The General tab you can change the name of the region and the region’s color. The HDR Multiplier I don’t know what is it yet, but I believe it’s isn’t that useful in-game since the regions don’t appear.
The Shapes tab is where you can change the region’s size, the region’s center position and also make custom shapes.
The Negative checkbox is only used for custom shapes, so it will be explained later on.
Custom Shapes
Custom shapes are created by making additional regions inside an already created region.
To do so you have to right-click anywhere on the regions list, if you right-click on a region you can duplicate it and if there is more than one region on the list, you can delete it.
Now create a circular region, set the center point and the size where you want and check the Negative checkbox.
Checking the negative box on the circular region deletes that area in the rectangle region.
Press ok to see the results.
You’ll see an orange rectangle with an empty circle inside it, basically the region is only the orange part.
And you successfully created a custom shape.
You can create any shape with this, just remember, the limit is your imagination.
You can also change the shapes' position inside a region, by selecting the region, select the shape you want to move and then you can drag it to where you want it.
After selecting the shape the first time you can drag and drop any shape inside the region.
Hope this tutorial was useful to you.