Water Guide
| Author: Coldrocker (udmod.com) | Tags: beginner terrain water | |
| Source: http://www.udmod.com/showthread.php... | Added 15 years ago |
Adding Water and Changing its Height
Since the vanilla Starcraft editor, many features of the editor has changed over time, none so more important then that of water. This tutorial will explain how water works, how to use it and how to change its level/state via triggers.
How To Add Water
After opening the map you are working on, switch to the terrain pallete by pressing the shortcut T. Click the water drop icon to tab to the water pallete. It should bring up two buttons asking you to add water or remove water. We want to add water, so click the add button and select a water type.
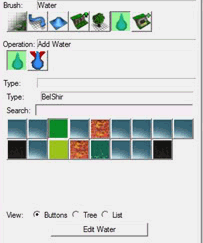
For this tutorial I will be using the Redstone lava water type. Placing the default water types, places it in 8x8 blocks at a height 9.0.
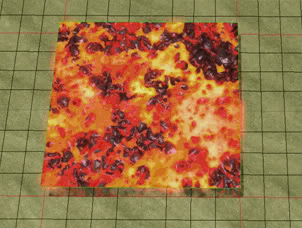
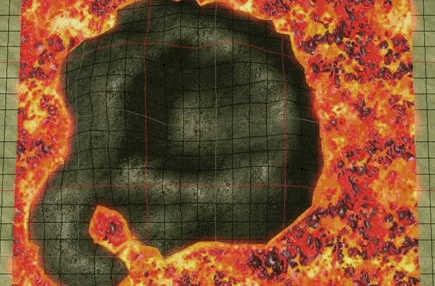
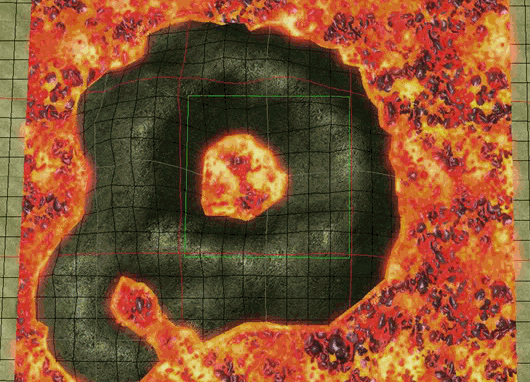
Place some more blocks of water untill you have a large enough area to map in.Add some land via the raise and lower terrain tool. You can also use cliffs if you so desire. Now for my map i want to have a mini volcano so I have created carefully land that covers the entire middle 8x8 water block. NOTE: I did not add in a middle block of lava.
Create Custom Water
I want the middle lava to be lower then the rest, so to do this I am going to create a custom water tile and change its height.Open up the data editor and bring up the water tab.
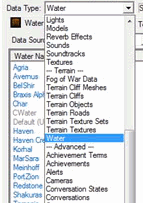
Right click on the left pane anywhere and do Add New Object. Title your new lava whatever you want and make sure you base it off the water type that you want.

Now go back into the terrain editor, bring up the water tab and add your new custom water in the area that you desire. Make Sure to press refresh train objectives to see the updated water.
Changing the Water's Height In Editor
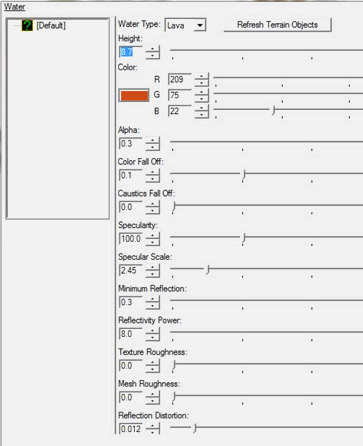
To change the height of the water we need to go back into the data editor and select the state field that is on the right.

This should open up the water state panel with lots of custom values. For this tutorial I will be just modifying the height, making it slightly lower to 8.7.
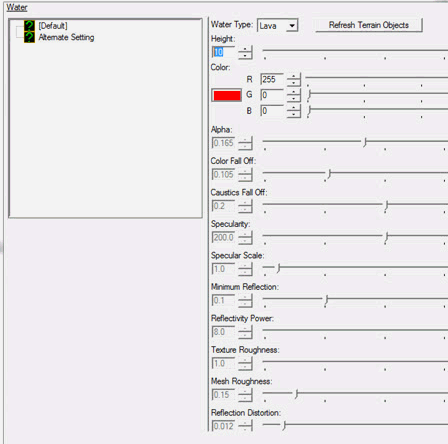
Now to add a new water height/state you want to right click on pane on the left and click Add Water State button. Note: You have to have the water added in the map to be able to create new water states. For this new state I changed the color back to the red of the lava and made the height value go to 10.
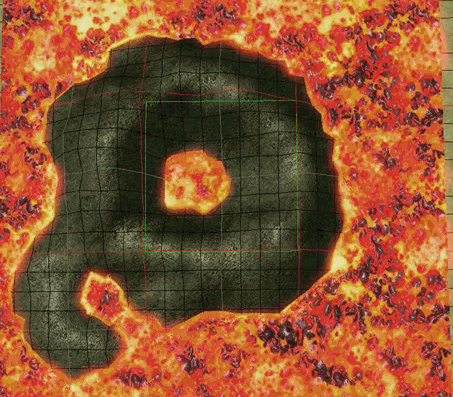
Click ok and go look at your terrain. You should see differences if you changed the height of the default value.
Changing Water Height In Game
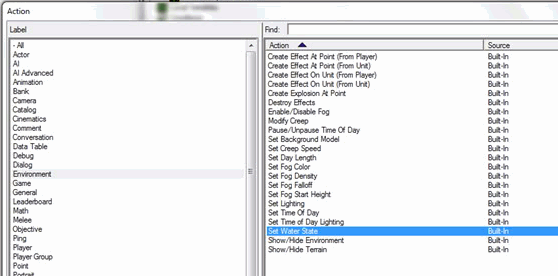
For this you will need to open up the trigger editor. Create a new trigger, add whatever event that you desire and when adding a new action, pick the environment category and select the Set Water State action.
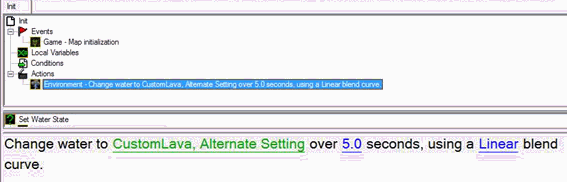
Now simply modify the state value to that of your 2nd state on the custom water that you made. Changing the seconds of blend time will change how long the lava/water takes to change to the second height.
Test the map and you should now have lava/water that raises/changes on command!
Since the vanilla Starcraft editor, many features of the editor has changed over time, none so more important then that of water. This tutorial will explain how water works, how to use it and how to change its level/state via triggers.
How To Add Water
After opening the map you are working on, switch to the terrain pallete by pressing the shortcut T. Click the water drop icon to tab to the water pallete. It should bring up two buttons asking you to add water or remove water. We want to add water, so click the add button and select a water type.
For this tutorial I will be using the Redstone lava water type. Placing the default water types, places it in 8x8 blocks at a height 9.0.
Place some more blocks of water untill you have a large enough area to map in.Add some land via the raise and lower terrain tool. You can also use cliffs if you so desire. Now for my map i want to have a mini volcano so I have created carefully land that covers the entire middle 8x8 water block. NOTE: I did not add in a middle block of lava.
Create Custom Water
I want the middle lava to be lower then the rest, so to do this I am going to create a custom water tile and change its height.Open up the data editor and bring up the water tab.
Right click on the left pane anywhere and do Add New Object. Title your new lava whatever you want and make sure you base it off the water type that you want.
Now go back into the terrain editor, bring up the water tab and add your new custom water in the area that you desire. Make Sure to press refresh train objectives to see the updated water.
Changing the Water's Height In Editor
To change the height of the water we need to go back into the data editor and select the state field that is on the right.
This should open up the water state panel with lots of custom values. For this tutorial I will be just modifying the height, making it slightly lower to 8.7.
Now to add a new water height/state you want to right click on pane on the left and click Add Water State button. Note: You have to have the water added in the map to be able to create new water states. For this new state I changed the color back to the red of the lava and made the height value go to 10.
Click ok and go look at your terrain. You should see differences if you changed the height of the default value.
Changing Water Height In Game
For this you will need to open up the trigger editor. Create a new trigger, add whatever event that you desire and when adding a new action, pick the environment category and select the Set Water State action.
Now simply modify the state value to that of your 2nd state on the custom water that you made. Changing the seconds of blend time will change how long the lava/water takes to change to the second height.
Test the map and you should now have lava/water that raises/changes on command!